Screen Shot 2014-09-03 at 11.25.02 AMTraveling to a new place by plane, train or car, can present our senses and skin with a whole host of adjustment triggers, so we sat down with Dr. Goldfaden and enlisted his expertise to talk about how we can keep breakouts, dehydration and dullness at bay all while showing up in our final destination ready to charge forward!

How does flying take a toll on your skin? 

“Flying dehydrates skin which can cause dryness and possible breakouts. When skin gets dehydrated excess oil is produced to compensate and this can result in breakouts a few days after your flight.” Dermatologist, Dr. Gary Goldfaden MD

What measures can you take in the air to keep it moist and hydrated? Should you bring a spray, drink lots of water, continue to moisturize? Steer clear of alcohol? 

“Drinking water is always important but start hydrating a few days before, just drinking water during the flight is not going to do much. Before flying wash your face with a gentle cleanser that is alcohol-free and then seal it with a hydrating serum. Then apply an oil or very hydrating moisturizer. Wearing foundation is not the best idea but if you must try and use a light weight one or tinted moisturizer. Drinking alcohol on a plane or on the ground will absolutely dehydrate you and your skin-so steer clear in the air!” Dermatologist, Dr. Gary Goldfaden MD

If you’re headed to a tropical locale with a hot, humid climate – how can that affect your skin? Cause breakouts, rashes, excessive oil production? What can you do to keep it calm? 

“Hot humid climates can cause skin to go a little crazy at first. Think about what types of products you are packing. Steer clear of heavy moisturizers, retinols or peels while there or at least until your skin gets comfortable with the climate. If using an oil make sure it is a balancing oil-nothing too heavy. Do not do a peel or use retinol products the night before you leave. Sometimes is is nice to let your skin breathe a little. Try just wearing an oil free serum instead of a moisturizer and see how it feels. If you feel dry then use a light weight moisturizer.  It is important to listen to your skin. If you tend to get flushed from heat and humidity cool compresses work great or a misting water. Always wear an SPF, look for a light weight dry mist that contains soothing ingredients such as Organic Red Tea.” Dermatologist, Dr. Gary Goldfaden MD

 What about a very dry, desert climate? What effects can that have on your skin? How can you treat it and take precautions? 

“A dry, dessert climate will dry your skin out quickly. Make sure to hydrate your skin with a serum and moisturizer. These types of climates can be windy, so be cautious not to get a wind burn. If you are outside for long periods of time cover your face with a light weight cloth and of course wear an SPF.” Dermatologist, Dr. Gary Goldfaden MD

What about high altitudes? 

“High altitude climates can be very harsh on the body and the skin.  Due to the location to the sun (you are closer to it) UVA rays are much stronger. Sun burn is more common as well as wind burn. If you know anyone who lives in a ski town you have seen what sun damage and high altitude can do to the skin-think leather baseball mit…..Always hydrate the skin by using extra layers of hydrating serums and moisturizers/oils.” Dermatologist, Dr. Gary Goldfaden MD

What about supplements and our diet in general? How can those help? 

“Regular intake of Vitamins and a healthy diet contributes to overall health and prevents your body from being sick and run down, especially when traveling. Clear and glowing skin starts from the inside. Eating foods rich in Omega-3 fatty acids, the most beneficial is Salmon, can greatly reduce inflammation, reduce dryness and increase circulation – a key attribute to healthy, youthful-looking skin. Daily consumption of vitamins specifically my favorite vitamin – Vitamin D and an overall multi-vitamin and Omega-3 greatly impacts your overall health.” Dermatologist Dr. Gary Goldfaden MD

Written by Angela of Eat Spin Run Repeat

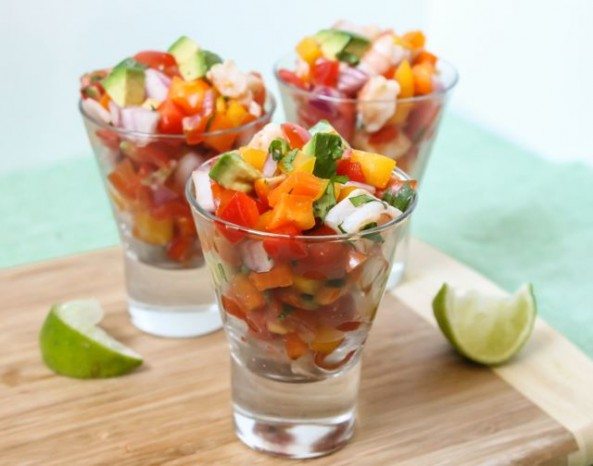
Pico-de-Gallo-Shrimp-Cocktails-1

Add some colour to your summer patio parties with this healthy appetizer!

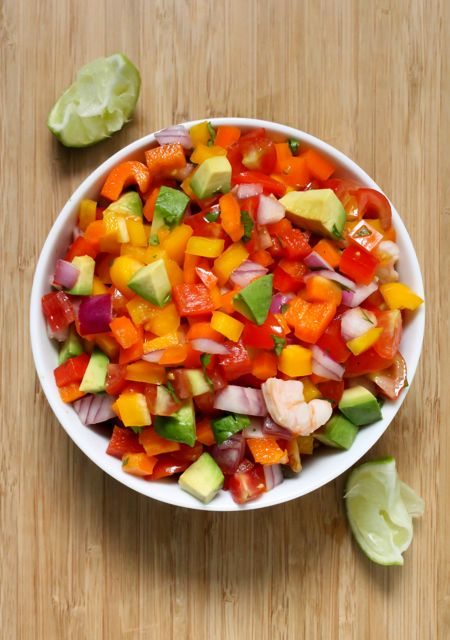
Patio season is here, and along with that comes plenty of opportunities to dine al fresco. I don’t know about you, but I love entertaining and creating a menu is my favourite part of the preparation process. Since it’s summer, I tend to choose dishes that use plenty of fresh produce and are full of colour. Case in point:

pico-de-gallo-mix-2

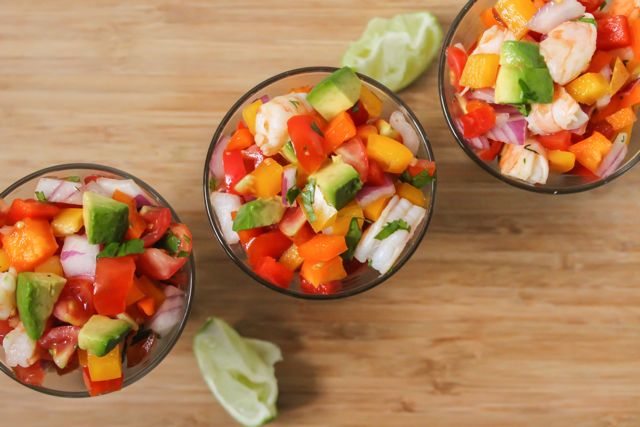
These shrimp cocktails are really easy to throw together, only require about 15 minutes of prep. Serve them in small cocktail glasses, or in a larger bowl that guests can dip into with nachos. Enjoy!

Pico-de-Gallo-Shrimp-Cocktails-2


Pico de Gallo Shrimp Cocktails

Prep Time: 15 mins
Cook Time: 4 mins
Makes: 6 appetizer-sized servings

Ingredients

  • 1 clove minced garlic
  • 1 tsp grated or finely minced ginger
  • 12 large raw shrimp, tails removed
  • 1/3 cup lime juice, divided
  • 1 cup seeded, diced tomatoes
  • 1/3 cup diced avocado
  • 1 cup mixed sweet bell peppers
  • 1/2 cup diced red onion
  • 1/2 small jalapeno pepper, seeds removed and very finely minced
  • 1/4 tsp ground cumin
  • a few pinches of dried chili flakes (optional)
  • 1 tbsp finely chopped cilantro, plus more to garnish

Instructions:

  • In a small non-stick skillet, heat the garlic, ginger and half of the lime juice for 1 minute on high. Add the shrimp and cook for about 2 minutes per side, or until completely opaque. Remove from heat.
  • Chop all vegetables and combine in a bowl with the remaining lime juice, cumin, chili flakes, and cilantro. Toss to coat.
  • When the shrimp are cool enough to touch, chop them into small pieces. Mix into the bowl. Allow it to sit at room temperature for at least 15 minutes.
  • Divide the mixture evenly between cocktail cups and serve garnished with additional cilantro and lime wedges, if desired.

Angela is an avid runner, fitness instructor, foodie, healthy living blogger, and owner of her business, Spin 360 Health Coaching. Having been overweight, unhappy and insecure as a teenager, Angela took control, changed her unhealthy habits, and adopted a clean eating lifestyle that she continues to maintain today. Her goal is to support, inspire, and motivate others to improve their health and be their best. You can learn more about her on her blog, Eat-Spin-Run-Repeat.com.

Blog: http://eat-spin-run-repeat.com

Twitter: @eatspinrunrpt

Instagram: @eatspinrunrpt

Facebook: http://www.facebook.com/EatSpinRunRepeat

Pinterest: http://pinterest.com/eatspinrunrpt


By Angela of Eat Spin Run Repeat

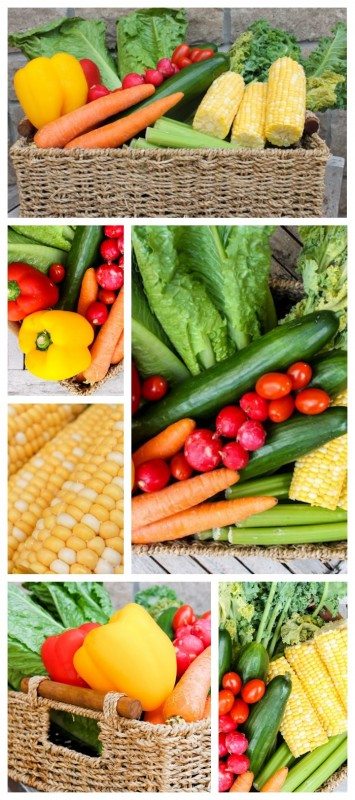
Bring the farmer’s market to your table!

If visiting a local farmer’s market isn’t already something you do each week, I highly suggest putting it on your summer bucket list. Not only is it good to support local businesses, but eating food grown close to home is better for the environment. It also tastes a lot better than food that has spent hours in transit on the back of a truck! Here in south western Ontario, we’re blessed to have a large number of farmers who grow everything from corn and green beans to peaches and berries. Exploring these markets is one of my favourite Saturday activities, and I often come home with a basket full of produce that covers every colour in the rainbow.

Farmers-Market-Produce

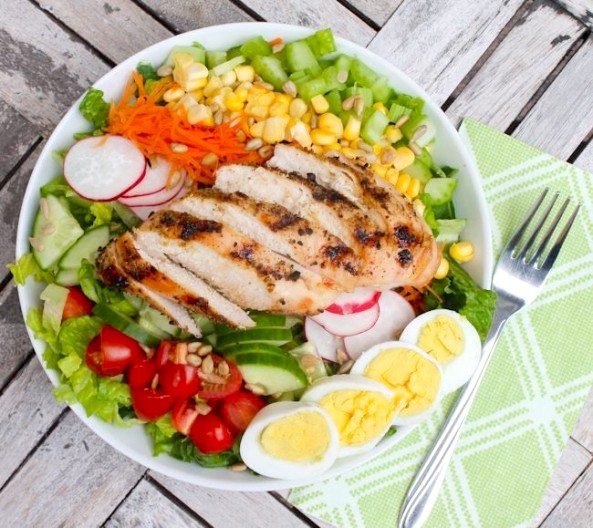
For an easy to make, totally satisfying meal, I like to throw together as much colourful produce as possible in one enormous salad, just like the one below. They don’t make them like this in restaurants, friends! Feel free to mix up the ingredients with whatever’s being sold at your local market.

Farmer's Market Chopped Salad - Eat Spin Run Repeat 1

Farmer’s Market Chopped Salad

Prep Time: 20 mins
Cook Time: 16 mins
Makes: 2 meal-sized servings

Ingredients

  • 2 boneless skinless chicken breasts, about 130g raw weight
  • salt-free seasoning mix
  • 4 cups mixed greens (radicchio, spinach, kale, romaine, etc)
  • 1/2 cup chopped celery
  • 4 radishes, grated or sliced
  • 1/2 cup shredded carrot
  • 1/2 cup chopped bell peppers
  • 1/2 cup chopped cucumber
  • 2 hard boiled eggs, sliced
  • 1/2 cob corn, either cooked or raw, sliced off the cob.
  • 2 tbsp unsalted sunflower seeds

Apple Cider Vinaigrette:

  • 2 tbsp extra virgin olive oil
  • 1/4 cup apple cider vinegar
  • 1 tbsp honey or maple syrup

Instructions:

  • Preheat the barbeque to medium-high.
  • Whisk together all ingredients for dressing in a small bowl.
  • If the chicken breasts are much thicker in the middle than the outsides, pound them to even thickness with a meat mallet.
  • Using a basting brush, brush the chicken with a bit of apple cider vinaigrette, and set the rest aside. Sprinkle chicken with seasoning of choice. I like to use Kirkland Organic No-Salt Seasoning from Costco, but Mrs. Dash is another good salt-free option.
  • Grill the chicken breasts for about 8 minutes per side, or until no longer pink in the middle.
  • While the chicken cooks, prep the veggies. Slice or shred as indicated above. Cut eggs into even slices.
  • In a large bowl, toss the mixed greens with half of the dressing. Arrange 2 cups of greens in each salad bowl.
  • ‘Line up’ the veggies on top of the greens, and place the sliced eggs at the side. Sprinkle with sunflower seeds.
  • When chicken is cooked, let it rest 2-3 minutes before slicing into strips. Use them to top the salads.
  • Drizzle remaining dressing over top and serve.

Angela is an avid runner, fitness instructor, foodie, healthy living blogger, and owner of her business, Spin 360 Health Coaching. Having been overweight, unhappy and insecure as a teenager, Angela took control, changed her unhealthy habits, and adopted a clean eating lifestyle that she continues to maintain today. Her goal is to support, inspire, and motivate others to improve their health and be their best. You can learn more about her on her blog, Eat-Spin-Run-Repeat.com.

Blog: http://eat-spin-run-repeat.com

Twitter: @eatspinrunrpt

Instagram: @eatspinrunrpt

Facebook: http://www.facebook.com/EatSpinRunRepeat

Pinterest: http://pinterest.com/eatspinrunrpt